This post explain in detail how to debug live WordPress Site on Local Server. This is a step by step guide on how to move live website on local machine and set up debug parameters on local environment for WordPress site.
Step 1: Set up Local Machine for WordPress site Hosting using MAMP
WordPress uses Apache web server for running PHP scripts and MySQL database to store data in the backend. MAMP is an easy to set up personal web server. It quickly set up MySQL and Apache server on your local machine. Download and install MAMP server on your local machine from Here.
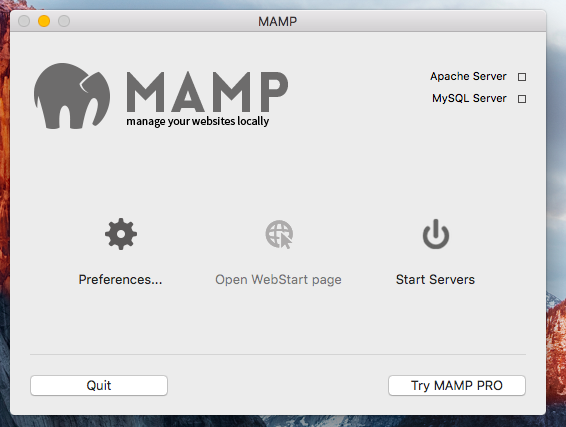
Once installation is complete, open MAMP application and click on Start Servers. This will start Apache Server and MySQL server on your local machine.
Step 2: Create database on your local machine
Click on Start Servers -> "Open WebStart Page" from the MAMP application. This will open up MAMP application home page. Navigate to "Tools -> phpMyAdmin" option from the top menu options.
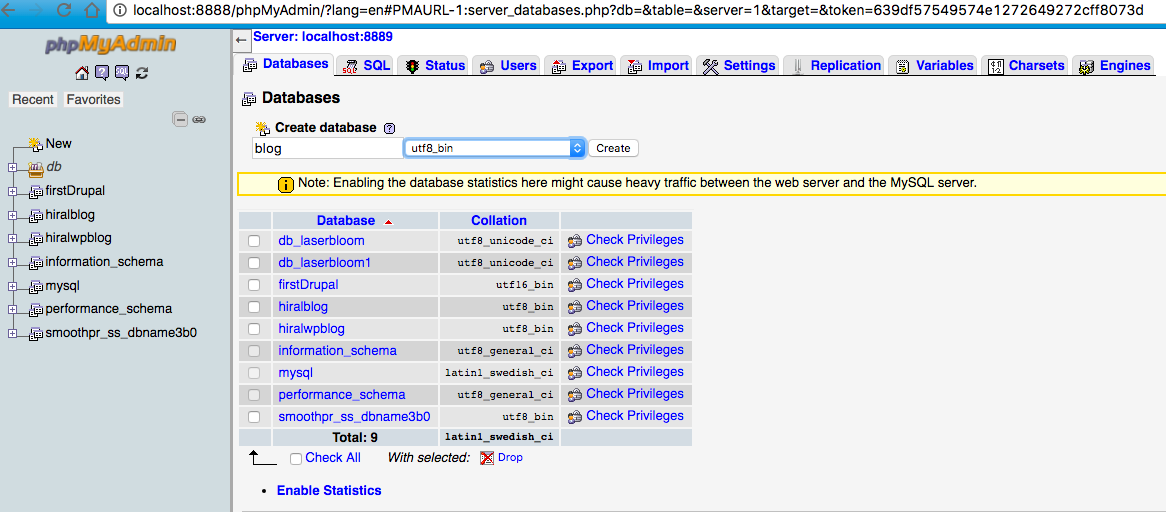
This will open up phpMyAdmin webpage for managing database on your local machine. Click on New to create new database. Enter database name and Collation for the DB.
Step 3: Set up WordPress on your local machine and run it on MAMP server
Create folder as localwordpress into /Applications/MAMP/htdocs/ on MAC and c:\MAMP\htdocs on Windows machine. Download WordPress folder from Here. Move wordpress files into just created localwordpress folder.
Now you are ready to run wordpress site’s instance on your local machine. Open your browser and run http://localhost:8888/localwordpress/wp-admin for wordpress site set up. Fill out information as mentioned in below image and hit submit.
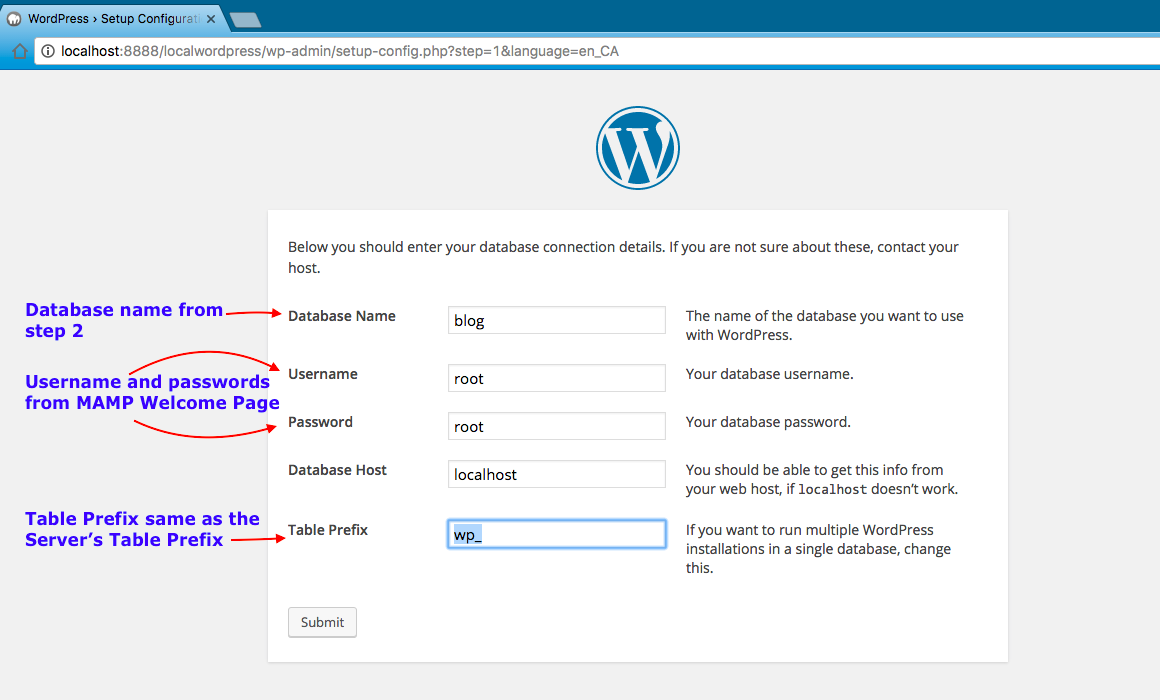
This is the set up of WordPress site on your local machine. From next step onwards we will move live site’s wordpress content on our local machine.
Step 4: Move WordPress Live Site Files to Local Server
Our local machine is ready with the WordPress setup. In this step, we have to move live site’s content into our local WordPress site. Download any FTP client to achieve file transfer in this step. I prefer using FileZilla FTP client for this purpose.
Open FileZilla client on your local machine and connect it to the server where your live WordPress site content resides. Navigate to wp-content directory on local machine and server machine. Copy all files and folder which are under wp-content direcotry from server to local machine. We want to overwrite all content under wp-content folder of local machine with the wp-content folder of server. The same procedure is depicted in below image.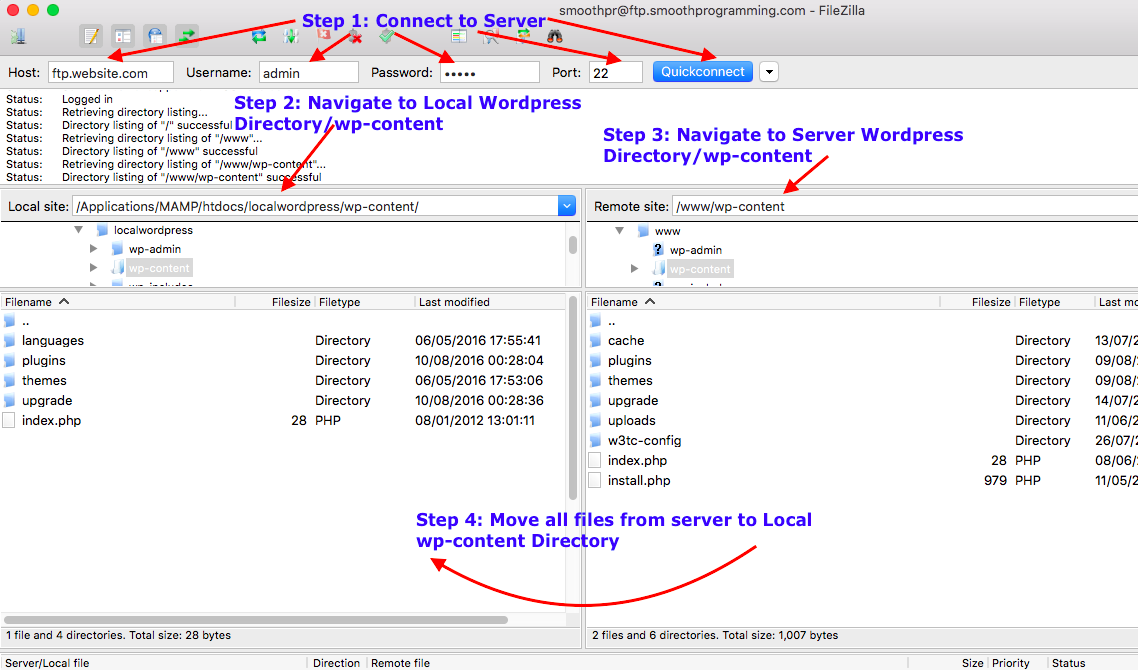
Step 5: Move WordPress Live Database to Local Server
Now its time to move Database from Live site to Local server. Login to the cPanel of your website hosting provider and navigate to phpMyAdmin panel. Select the database which is attached to your live WordPress site. Click on Export -> Custom Export Method -> Format as SQL -> Check on "Add DROP TABLE / VIEW / PROCEDURE / FUNCTION / EVENT / TRIGGER statement" -> Click GO . This will download sql script on your local machine.
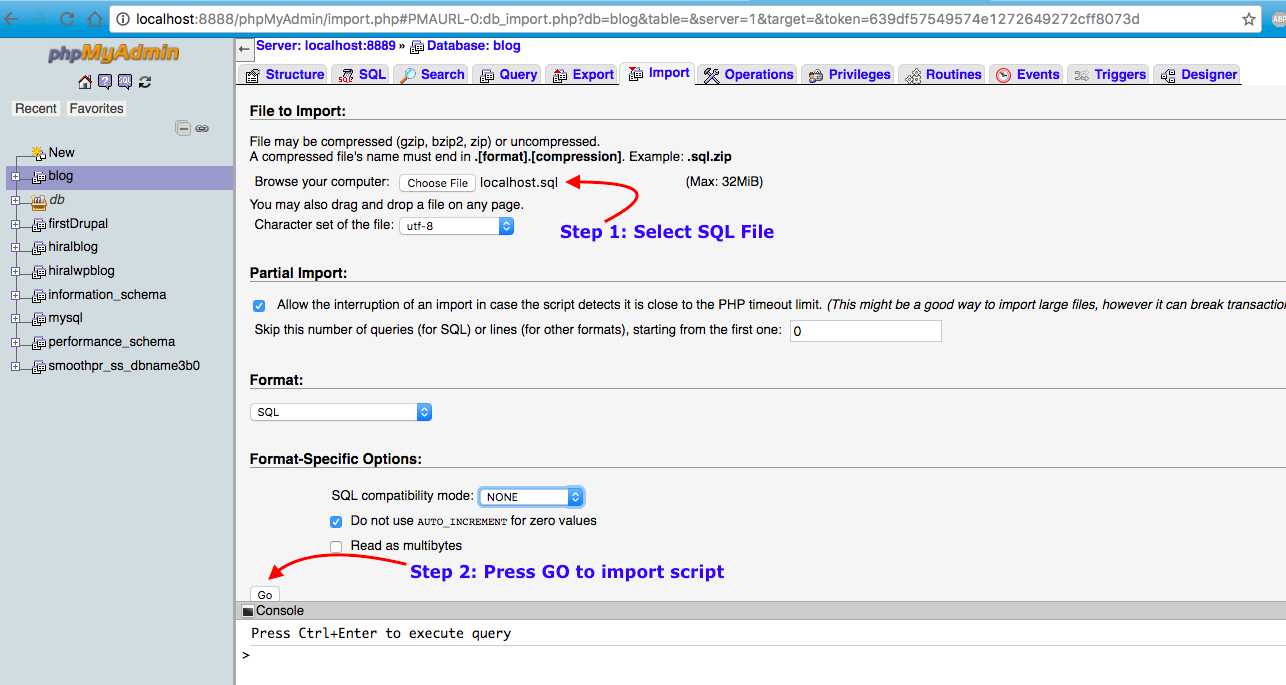
Go to the database which we created in Step 2. Click on import -> Select the SQL file which we downloaded from the server's phpMyAdmin panel -> Click on GO . This will sync local db with server’s db.
Execute following script to change reference links from live site to local site in blog posts. Change the “http://www.xyz.com” with your live site URL.
Step 6: Debug WordPress site on Local Machine
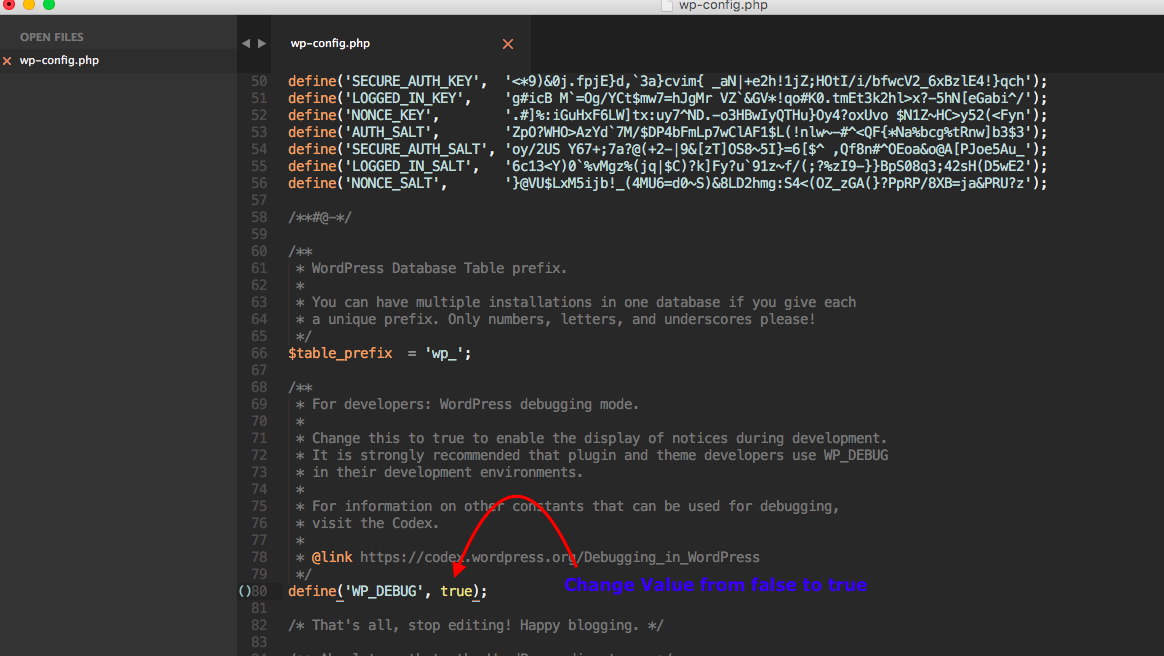
Open /Applications/MAMP/htdocs/localwordpress/wp-config.php file on MAC and C:/MAMP/htdocs/localwordpress/wp-config.php file on Windows. Change the value of WP_DEBUG constant value from false to true as shown in the below image. This will show error messages (if any) in the browser when you visit a local copy of the website.
Conclusion
This is the detailed introduction on moving website from live site to local machine and how to set up debug parameters for local copy of WordPress site.

